8266控制舵机开门代码
不懂可以评论,提问。
代码在最后面
问题一:打开arduino IDE后,显示安装依赖失败。
原因:中国网络环境不好。
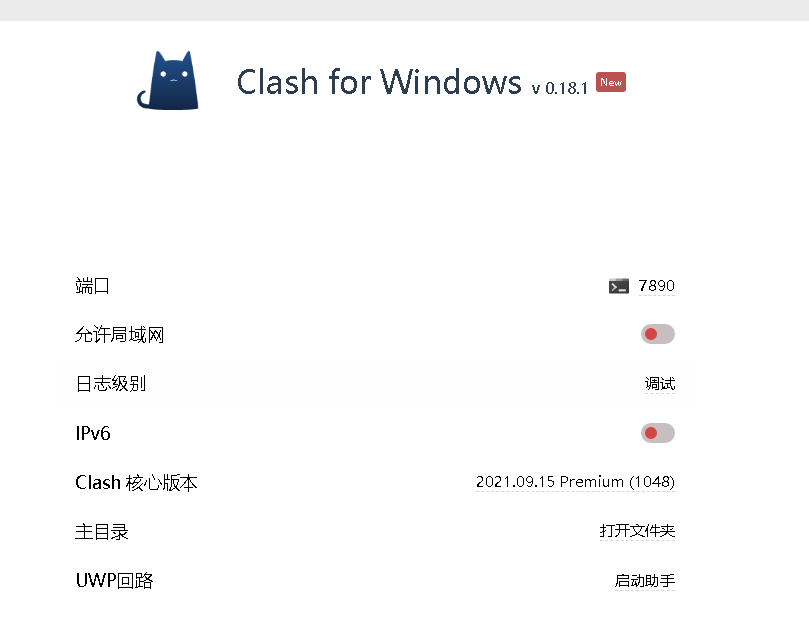
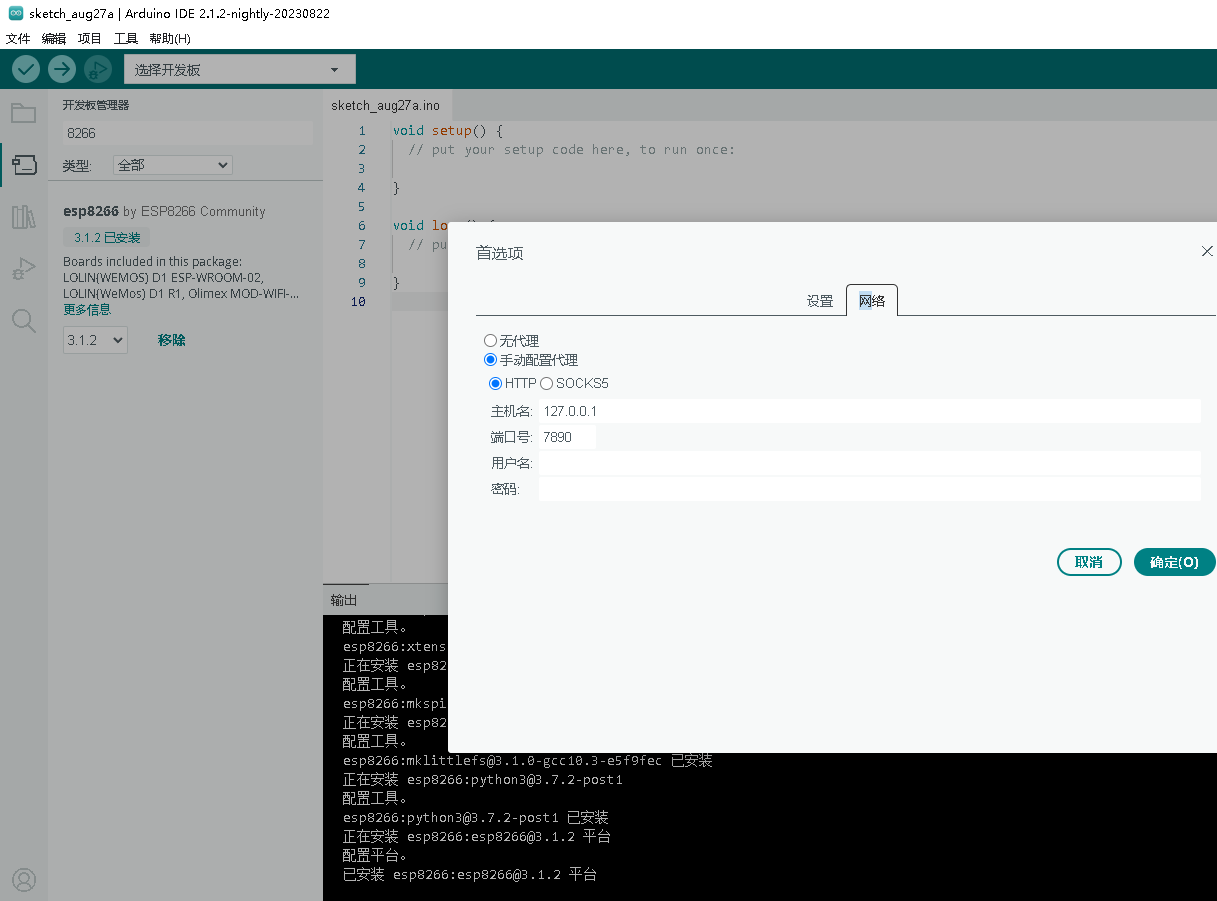
解决方法:经过测试发现clash的系统代理对arduino不起作用,那么需要在arduino内单独设置代理。首先在clash里面找到端口,记住端口号,然后点击arduino的文件-首选项-网络,再选中手动配置代理,主机名填本地地址127.0.0.1,端口要填写刚刚让你记住的端口。然后确定保存。接着重启arduino,就会顺利安装依赖。


问题二:问题一解决后,打开Arduino IDE后,无法选中8266开发板,显示灰色。
原因:部分开发板的文件没有自带
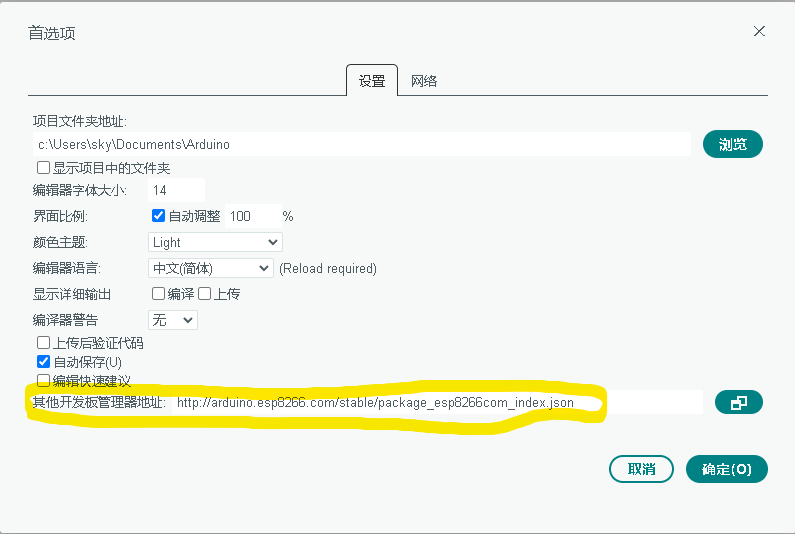
解决方法:在设置中的填入地址:```
http://arduino.esp8266.com/stable/package_esp8266com_index.json
然后点击工具,选择开发板,选择开发板管理器,在弹出的窗口搜索8266出来这个,选择安装。20秒后,安装完成,问题解决。

#include <ESP8266WiFi.h>
#include <ESP8266WebServer.h>
#include <Servo.h>

const char* ssid = "JDCwifi_99A7";
const char* password = "12345678";
ESP8266WebServer server(80);
Servo myservo;


void setup() {
  // 初始化串口
  Serial.begin(115200);
  // 连接WiFi
  WiFi.begin(ssid, password);
  while (WiFi.status() != WL_CONNECTED) {
    delay(1000);
    Serial.println("Connecting to WiFi...");
  }
  Serial.println("Connected to WiFi");

  // 初始化舵机
  myservo.attach(D4);  // 使用D1引脚
  myservo.write(180);  // 初始化舵机位置

  // 设置路由
  server.on("/servo", HTTP_GET, handleServoControl);
  server.begin();
}

void loop() {
// 如果缓冲区中有数据,则读取并输出
if(Serial.available()>0)
  {
    char ch=Serial.read();
    Serial.print(ch);

  }
  else{
    server.handleClient();
  }
}


void handleServoControl() {
  if (server.hasArg("position")) {
    int position = server.arg("position").toInt();
    myservo.write(0);  // 设置舵机角度
    delay(3000);  // 等待一秒
    myservo.write(180);  // 设置舵机角度
    server.send(200, "text/plain", "Servo moved!");
  } else {
    server.send(400, "text/plain", "Missing position argument!");
  }
}